
Drivers Guide: Ray FF1600 at Okayama Short Course
Have more questions? Ask us in the Discord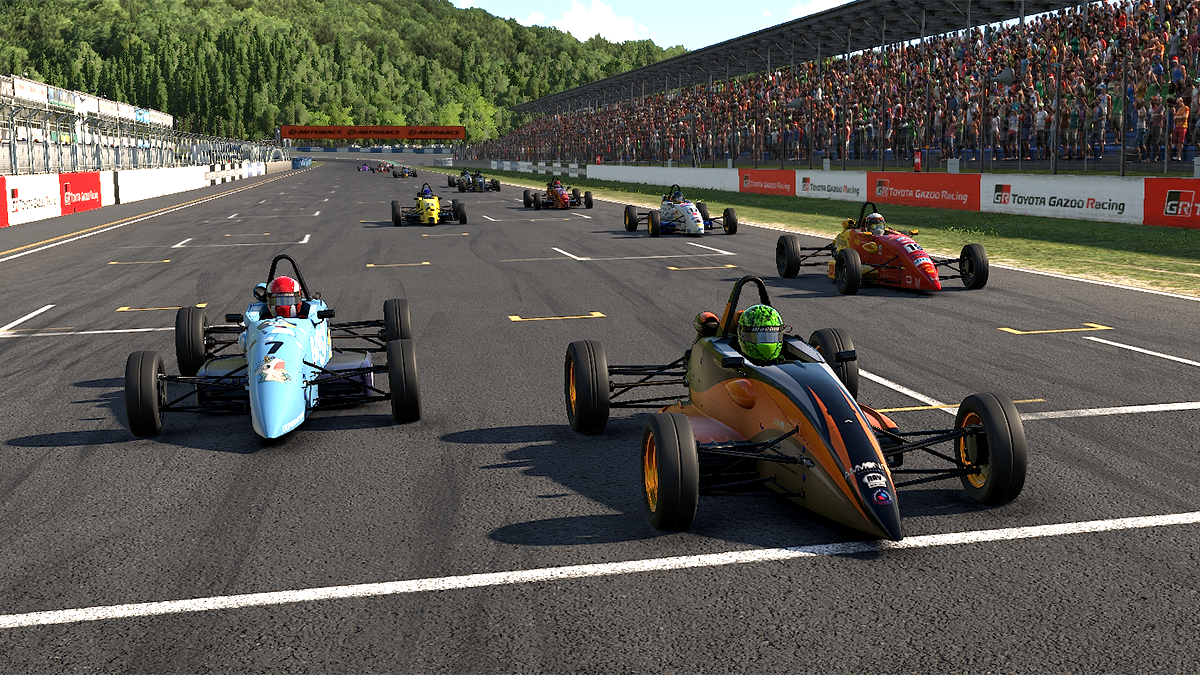
Quick Summary
The Ray FF1600 at Okayama Short is one of iRacing’s purest and most demanding rookie-series combinations. The car punishes momentum loss heavily — with only ~110 hp and no wings, every mph you scrub in a corner is momentum you cannot buy back on the short straights. Okayama Short’s seven corners in just 1.2 miles (~2.09 km) give you almost zero margin to recover from a slow corner before you’re in the next braking zone. brakinglab
What makes this combo difficult:
- The FF1600’s open differential means exit understeer is the default condition — you must manage entry rotation precisely to counter it iracing
- Okayama Short is relentless: there is no “rest lap.” Every corner matters for lap time
- Fixed setup removes all mechanical tuning options — driving style is your setup
- Pack racing creates first-lap chaos at multiple pinch points (T2, the hairpin)
What separates fast from average:
- Smooth, controlled brake release that preserves front grip through rotation
- Maximizing exit speed from the hairpin and the final corner (the two corners that set up the track’s longest straights)
- Consistent minimum speeds — not late braking — define lap time in this car coachdaveacademy
- Zero incidents in races: clean finishers gain more iRating than fast crashers
Car Overview: Ray FF1600
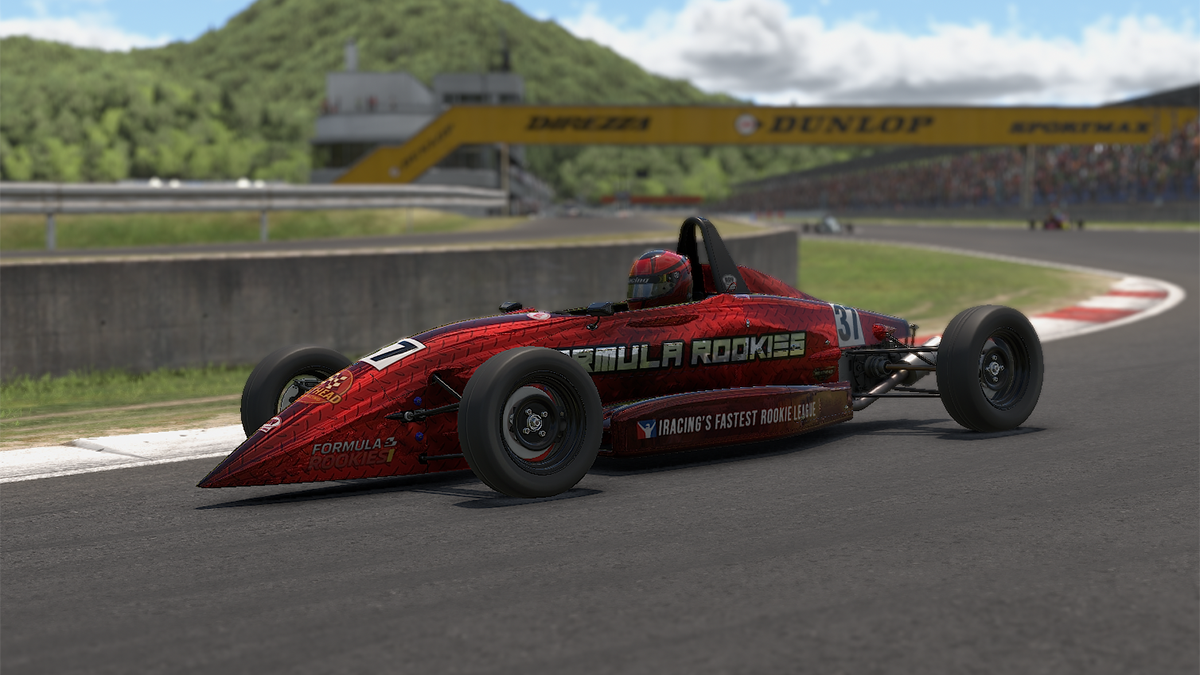
The Ray FF1600 is a real-world formula car produced by Ray Race Cars, faithfully reproduced in iRacing. Built around a 1.6-litre engine producing approximately 110 horsepower in a ~400 kg chassis, it is a pure mechanical-grip machine with no aerodynamic downforce whatsoever. iracing
Power delivery: Power comes in smoothly and predictably. The car has a 4-speed H-pattern gearbox. In iRacing you do not need to use the clutch for shifts — a simple lift upshifts, and a throttle blip downshifts. Importantly: iRacing can perform automatic throttle blips on downshifts via Driver Aids in settings, which is recommended for beginners to prevent rear instability. coachdaveacademy
Braking behavior: The FF1600 is very responsive to brake input. The car loads the front tires under braking, which creates your turn-in grip window. Dump the brake pedal suddenly and the front unloads immediately, causing understeer push. Trail braking is the key technique here — but the FF1600’s trail window is shorter than a winged car. Think of it as a smooth 100%-to-0% brake pressure over roughly 1 second as you add steering.
Brake bias: This is the one adjustable in-car control confirmed available in the Ray FF1600 in iRacing. The fixed rookie setup’s brake bias starts at approximately 54% (front). You can adjust this with a mapped button/key during a session. A forward bias (higher %) stabilizes braking and prevents rear snap; a rearward bias helps rotation but risks rear lockup. This is not a setup change in the traditional sense — it is an in-session driving tool. Start at 54% and experiment in 0.2–0.5% increments. youtube
Handling characteristics:
- Understeer on power is the default trait due to the open differential — getting to full throttle quickly (rather than gradually feeding it in) actually helps combat this iracing
- Oversteer on entry is possible and punishing: if you trail brake too aggressively or hit a curb that unsettles the car, the rear will step out youtube
- Tire behavior: The treaded tires (not slicks) reward smooth inputs. Sliding spikes tire temperature in iRacing’s model, which degrades grip progressively coachdaveacademy
- Weight transfer is the driver’s primary tool — braking shifts load to the front for rotation; throttle shifts load rearward for traction
Mistakes the car punishes most:
- Stabbing the throttle mid-corner with steering lock applied → snap oversteer
- Dumping the brake instead of trailing it → understeer push
- Riding curbs that unsettle the car → diagonal weight spike and snap
- Over-driving entry speed → missing apex and carrying understeer to exit
Track Overview: Okayama Short Course
Okayama International Circuit opened in 1990 and was historically known as TI Circuit Aida — it hosted the 1994 and 1995 Formula One Pacific Grand Prix. The Short layout uses 7 of the circuit’s turns in just 1.2 miles. iRacing’s Okayama carries named corners honoring the British drivers who christened it: Williams, Hobbs, Moss, Redman. iracing
Layout rhythm: The track is a clockwise, medium-speed technical circuit. Think of it in two halves: a twisty opening sector (T1–T3) that feeds a short front straight, then a more committed second sector running through the hairpin and onto the back straight.
Key corners for lap time:
- T1 (First Corner / Entry) — Entry from the main straight; sets up the S-section
- T2 (Williams / double-apex chicane-style section) — The trickiest sequence on the Short layout. Two connected corners where entry line choices cascade
- The Hairpin — Biggest braking zone; best passing opportunity; critical for back-straight speed
- Final Corner (Last Corner onto main straight) — Sets your main straight speed; most important corner for lap time
Passing zones: The hairpin (after the back straight) is the primary overtaking zone. The entry to T1 from the main straight is secondary.
Incident hotspots:
- T2 / Williams section: The first curb on the right has a notorious bump that will unsettle the car violently if hit — multiple video guides confirm this youtube
- Hairpin exit: Dropping a wheel off the exit curb onto astroturf/grass causes immediate spin youtube
- T1 exit: Running wide onto painted or grass surface with throttle applied → instant spin
Track limits: iRacing enforces track limits at Okayama. The exit curbs on the main corners are fine to use, but dropping wheels fully off the tarmac/curb onto green areas will trigger incidents and cost grip.
Surface and curbs: Generally smooth with mostly flat, friendly curbs. The exception is the right-side curb entering T2 (Williams), which has a pronounced bump that the community widely flags as a handling trap. youtube
Beginner Tips
Getting to the finish clean is worth more than a fast qualifying lap. Follow these fundamentals:
- Opening lap survival: Add at least 10–20 meters to your T1 braking marker and 20–30 meters to your hairpin braking marker on Lap 1. The accordion effect in a pack is real — drivers ahead brake earlier than they do in qualifying.
- Brake in a straight line first: Until you are comfortable, complete your braking before turning. This prevents rear instability and gives you a stable platform.
- Don’t overuse the T2 curb: The first right-side curb in the Williams section has a bump. Take a wider entry to avoid it entirely until you are experienced enough to manage the weight disturbance. youtube
- Learn the racing line by watching: The Erilla YouTube track guide (linked below) is the single best free resource for Okayama Short in the FF1600. Watch it before you drive. youtube
- Follow the ghost/ideal line: iRacing’s blue ideal line is a reasonable starting reference — it is not perfectly optimal, but it will keep you out of trouble while you build feel.
- Build consistency, not speed: Three laps within 1 second of each other is more valuable than one fast lap surrounded by two off-track excursions.
- Traffic management: In a pack, if someone dive-bombs the hairpin from way outside, give space and let them run wide rather than accepting contact. The penalty for a spin is 10+ seconds; the penalty for being squeezed is nothing if you give room.
- Incident avoidance: Avoid any x4 or higher incident in the first two laps. A 4x on Lap 1 almost always means you’ve ended someone else’s race too.
Corner-by-Corner Driving Guide
Note: Okayama Short has 7 corners. Braking distances below are starting-point references sourced from community track guides and Track Titan data; adjust based on your speed, tires, and conditions. All gear references assume the standard 4-speed FF1600 gearbox.
T1 — First Corner (Right-hander, entry from main straight)
| Approach | Full throttle on main straight, positioned center-right |
| Braking reference | Cone and color-change line on the left youtube; approximately 100m boards (draft: add 10–20m) |
| Gear | Downshift to 2nd |
| Line | Wide entry from the right, late apex, maximum track use on exit to the left |
| Trail brake | Yes — light trail to the apex helps rotation |
| Throttle | Smooth application after apex as you unwind steering |
| Curbs | Inside flat curb is acceptable; avoid exit astroturf — running wide here is a 1x waiting to happen |
| Common mistakes | Turning in too early (early apex kills exit); getting divebombed on Lap 1 |
| Gain time | Maximize track use on exit — use all of the road to the left to carry speed |
| In traffic | Brake marginally earlier; keep door slightly open to prevent getting punted from behind |
T2 — Williams Section (Double-apex right/left combination)
This is the most technically demanding section on the Short layout. youtube
| Approach | Short straight after T1; position left for wide entry |
| Braking reference | White line color change on the left; brake to approximately 50 mph minimum speed through the section youtube |
| Gear | Typically 2nd through the whole section |
| Critical warning | The first right-side curb has a bump that will unsettle the car significantly and can cause a spin if you load it with speed youtube. Take a wider entry to avoid it |
| Line | Wide entry → late turn-in after the bump zone → apex mid-curb of second part → use all exit curb to the left youtube |
| Trail brake | Light trail to the middle, then release as you commit to the second turn |
| Throttle | Wait until fully on the exit curb of the second part before committing to full throttle youtube |
| Curbs | Exit curb on the right is usable; the entry curb on the right is the trap — keep left of it |
| Common mistakes | Clipping the first right curb → big snap; going too narrow on entry → fights the second part of the corner |
| Gain time | The smooth, wide entry that avoids the bump actually allows a faster line than the seemingly quicker tight line |
T3 (Right-hander before back straight — effectively the hairpin approach)
This feeds directly into the hairpin. Carry momentum and set up wide for the hairpin.
| Approach | Use all available track to set up the hairpin entry |
| Line | Position to the left (outside) as you exit, setting yourself up for a wide entry to the hairpin |
| Throttle | Get to full throttle promptly; the short chute to the hairpin needs maximum speed |
Hairpin (Left-hander at end of back straight)
This is the most important corner on the Short layout for both lap time and passing.
| Approach | Back straight at full throttle; positioned left (outside) |
| Braking reference | 50 board on the right youtube; approximately 110–120m before apex; add 20m in draft |
| Gear | Brake from 3rd/4th to 2nd |
| Line | Wide entry from the left, very late apex (second half of the inside curb), square it up, maximum exit to the right |
| Trail brake | Yes — essential here. Trail brake to rotate the car to the late apex. The hairpin rewards the most time from a well-executed trail brake |
| Minimum speed | Approximately 55–65 km/h at the apex (Track Titan data: around 55–65 km/h range for this type of hairpin) |
| Throttle | As soon as the car is pointing straight — early, clean, committed. Open differential means early throttle application without steering lock is critical iracing |
| Curbs | Inside curb: light touch is fine. Exit curb: usable, but dropping a wheel fully off onto grass/astroturf will spin you youtube |
| Common mistakes | Braking too late → can’t make the apex; braking and turning simultaneously → rear lock; getting to throttle too early with steering lock → snap oversteer on exit |
| Gain time | Back up your braking 5m, focus entirely on earliest possible full-throttle exit. The back straight is long enough that 5 mph more exit speed matters considerably |
| In traffic | Best passing zone. Move to the inside decisively and early. Brake in a straight line. Do not battle someone side-by-side through the full hairpin — square it up and use the exit run |
T5–T6 (Mid-section back to main straight — through Redman/Hobbs/final corner)
The Okayama Short layout routes through a sequence of medium-speed corners back to the main straight. The final corner (Last Corner) is the most time-critical.
| Final Corner approach | Come from the mid-section; position right for wide entry |
| Braking | Approximately 60–70m before apex; 100/50m board references on the right |
| Gear | 2nd gear |
| Line | Late apex — this sets your main straight speed. Do not rush the apex |
| Trail brake | Yes — trail to rotate, then release and commit to exit |
| Segment 5 data (Track Titan): | Brake ~84m before apex; 2nd gear; minimum speed ~112 km/h app.tracktitan |
| Throttle | As soon as the car straightens — this exit directly determines your main straight and qualifying position |
| Common mistakes | Early apex → understeer to exit curb or grass; throttle too early with steering → snap; rushing this corner after a good run through the mid-section |
| Gain time | This corner plus the hairpin are where tenths live. Accept a slower entry to get a faster exit |
Advanced Driving Techniques
Once you are consistent, these refinements find the final tenths.
Trail braking in the FF1600: The “trail” overlap window is shorter than in a winged car. Think of it as applying steering while still on 20–40% brake pressure, then smoothly bleeding the brake to zero as you reach the apex. Too much brake into the apex makes the rear step out; too little means understeer push. The goal is using residual brake pressure to keep weight on the front and maintain rotation. This is most valuable at the hairpin and T1.
Rotation management: In the FF1600 with its open differential, the car’s natural tendency is to push (understeer) on power. Rotation must be earned on entry through brake release timing and steering angle. If you are understeering mid-corner, you entered too slow or turned in too little — not a power problem. Resist the urge to add steering mid-corner; it scrubs speed and overheats tires.
Minimum speed vs. exit speed: At Okayama Short, exit speed from the hairpin and final corner is always the priority. Carrying 3 mph extra through a corner entry but arriving at the exit at the same speed as a slower entry is almost never the better choice here. “Slow in, fast out” is not cliché — it is measurably faster on this track in this car.
Throttle shaping: Due to the open differential, getting to full throttle quickly rather than feeding it in gradually actually helps combat exit understeer. This is counterintuitive — but Max Esterson (iRacing-official car insight) confirmed this characteristic. The key is that the steering must be unwound first. Stab the throttle with lock still applied and you will spin. iracing
Identifying where time is lost: Use iRacing’s delta/timing overlay or a third-party tool like MoTeC/Garage 61. The two biggest time sources are:
- Minimum speed at the hairpin apex (slower minimum speed = slower back straight average)
- Exit speed from the final corner (directly sets main straight speed for the next lap)
Managing understeer on power: If you’re experiencing persistent exit understeer, try moving brake bias forward by 0.2–0.5% to get more front-tire load under braking/rotation, giving you a slightly higher-speed entry rotation, which sets the front up better for the throttle phase.
Managing oversteer on entry: If the rear snaps on trail-braking entries, move brake bias forward by 0.2–0.5% to add more rear stability. Also review your brake release rate — a sudden dump of the pedal (rather than a smooth bleed) is the single most common cause of entry snap in this car.
Fixed Setup Strategy
Because this is a fixed setup race, the car’s mechanical balance is predetermined. Your driving style must adapt to the car, not the other way around.
Adapting to a tight/understeery feel:
- Brake marginally earlier and carry slightly more trail braking to build front-tire load
- Take wider entries to increase the angle at which the front bites
- Move brake bias rearward slightly (0.2–0.5%) to encourage more rear-brake rotation
- Get to full throttle more quickly after the apex to reduce the power-understeer phase iracing
Adapting to a loose/oversteery feel:
- Brake in a longer, straighter line; reduce trail braking overlap
- Move brake bias forward to reduce rear brake force on entry
- Ensure brake release is smooth — the most common cause of oversteer in this car is a sudden pedal dump
- Straighten the wheel fully before squeezing throttle
Tire behavior over a stint: The FF1600’s treaded tires in iRacing build temperature quickly when you slide. Sliding consistently — even slightly — overheats the tires and progressively degrades grip. The first 2 laps are cold and slippery; tires come in from about Lap 3. If tires begin to “go off” late in the race, reduce slip angle by being slightly gentler and more patient — carrying 2 mph less minimum speed to preserve the tire is worth it if the alternative is a spin. coachdaveacademy
Fuel and pit considerations: Typical iRacing rookie-series FF1600 races at Okayama Short run 15–20 minutes. The FF1600 is fuel-efficient. Unless the race is unusually long (check the session details), fuel is not a strategy factor. No pit stops are generally required for sprint-length events.
Allowed in-car adjustments:
- ✅ Brake bias — Confirmed adjustable in-session. This is your primary tool. reddit
- ❌ No traction control, ABS, or anti-roll bar adjustments available in the standard FF1600 fixed format.
Qualifying Strategy
Qualifying at Okayama Short in the FF1600 is about momentum timing more than outright bravery.
Out-lap preparation:
- Complete at least one full out-lap before your flying lap to build tire temperature
- On cold tires, slides spike heat fast — avoid aggressive inputs on the out-lap or you’ll overheat the tire before your hot lap even begins
- Use the out-lap to confirm your braking markers and track condition
Building a gap:
- If another car is close behind, let them pass on the out-lap or create a gap of at least 3–4 seconds before starting your hot lap. A car in your mirror through the hairpin is a major distraction.
Flying lap execution:
- T1: Smooth and committed — do not run wide; track position through the first sector sets rhythm
- Williams / T2: The trap corner in qualifying. A conservative, wide entry here costs you perhaps 0.1s but saves you from a spin that costs 5s
- Hairpin: Your biggest qualifying time opportunity — trail brake deeply, hit the late apex, and commit to throttle early. This is where the fastest laps are made youtube
- Final corner: Second-most important. Get the exit right and carry maximum speed onto the main straight
Risk vs. reward: In the FF1600, a confident but smooth lap beats a heroic but ragged one. The car’s narrow tires do not have the same margin as a slick-shod formula car. A T2 spin costs you the entire qualifying session — not worth the risk for marginal gain.
How starting position affects race strategy:
- Starting P1–P3: Control the race from the front, especially into T1. Protect hairpin entry.
- Starting mid-pack (P5–P10): Survival on Lap 1 is the mission. One clean lap 1 gains more than a fast Lap 3.
- Starting at the back: Draft management is everything — stay in the train and wait for others’ mistakes rather than diving early.
Race Strategy
Start procedure:
- Smooth clutch release — the FF1600 breaks traction easily from standing starts
- Add 20–30m to your T1 braking marker on Lap 1 — accordion effects in the pack are real
- Stay center-right approaching T1; if you are defending from inside, do not close the door so aggressively that you kill your own rotation
First-lap priorities:
- Zero incidents trumps everything. A 4x incident on Lap 1 costs you race positions and iRating
- Expect accordion braking at T1, T2, and the hairpin
- If someone dives the hairpin and you have the outside, brake earlier and give room — an avoidable contact is always worse than losing one position
Best overtaking zones:
| Zone | Method | Notes |
|---|---|---|
| Hairpin | Inside pass, brake later, trail to late apex | Best zone; also requires care not to rear-end the car ahead |
| T1 | Inside run from main straight | Works with a strong exit off the final corner; commit early |
| Out-braking into final corner | Inside | Secondary option; exit speed is critical — don’t sacrifice it |
Where NOT to attempt risky passes:
- T2 / Williams — Too easy to lock up, run wide, or cause contact in a narrow section
- Mid-corner anywhere — Side-by-side in any FF1600 corner that isn’t a slow braking zone risks both cars
Draft management: The FF1600 benefits meaningfully from the draft on both straights. Use this:
- Sit 1–2 car lengths back on the straight to stay in clean air but maintain draft benefit
- A lift (not a brake) is enough to maintain gap in the draft — avoid jabbing the brake which unsettles the platform
- On the final lap, P2 in a lead draft is often better than P1 — time your run to the line
Pressuring a car ahead:
- Get a strong exit from the hairpin → carry draft on the back straight → show the nose early at hairpin entry
- The car ahead must either defend the inside (killing their exit speed) or stay wide (giving you room)
- Never risk a divebomb that puts both cars off — patience wins more races in this class
Recovering from a mistake:
- If you run wide or spin, wait until all traffic is clear before rejoining — a slow, safe rejoin costs 3 seconds; an unsafe rejoin causes a multi-car incident and a penalty
- After a half-spin or wide excursion, take the next corner 20% more conservatively to re-establish feel before pushing again
Common Mistakes
| Mistake | Why It Happens | Fix |
|---|---|---|
| Braking too late into the hairpin | Trying to look fast; draft makes approach speed deceptive | Use a conservative marker, nudge it in only when comfortable |
| Clipping the T2 entry curb (right side) | Tight line looks faster | Take a wider entry — the bump destabilizes the car youtube |
| Early throttle with steering lock | Impatience for exit acceleration | Unwind the wheel first, then squeeze throttle iracing |
| Dumping the brake pedal | Poor pedal feel/calibration; panic braking | Smooth bleed from 100% to 0%. Use a longer trail window |
| Early apex at the final corner | Rushing a corner that “feels” like it wants an early turn-in | Delay turn-in until track exit can be reached in a straight line |
| Weaving in defense | Instinct to block every move | One move, then hold your line. Late apex defends the exit |
| Ignoring cold tires | Straight into racing mode | First 2 laps: add 5–10m to brake markers, be gentler on throttle |
| Track limit violations on exit curbs | Chasing maximum track use | Two wheels on curb is fine; four off on grass triggers incidents |
| Divebombing the hairpin in traffic | Over-aggressive racecraft | Set up the exit instead — a squared entry with early throttle is faster and cleaner |
| Over-rotating T1 on standing starts | Over-confident launch | Smooth clutch release; moderate throttle application until traction is established |
Practice Plan
10-Minute Beginner Session
Goal: Learn the circuit without incidents.
- Drive 3 laps at 80% effort using the blue ideal line as a guide
- Identify T2’s entry curb bump — practice the wide-entry approach deliberately
- Note the two main braking zones (T1 and hairpin) using visible markers (boards, curb colors, cones)
- No time targets — survival and circuit familiarity only
Success metric: Three consecutive laps without going off-track.
30-Minute Focused Session
Goal: Build consistency and find the hairpin.
- Laps 1–5: Out-lap pace, focus on smooth brake release at every corner
- Laps 6–15: Pick ONE corner (the hairpin) and practice exclusively: wide entry, late apex, early throttle. Ignore all other corners except for safety
- Laps 16–20: Full hot laps — aim for laps within ±0.5s of each other
- Use active reset after any off-track incident to return to the pit immediately — don’t continue a lap on cold/dirty tires
- Use ghost lap replay in iRacing to compare your hairpin to your fastest lap
Success metric: Five consecutive laps within 0.5 seconds of each other.
60-Minute Competitive Preparation Session
Goal: Simulate race conditions, close the gap to the front.
- 0–10 min: Out-lap + tire warmup discipline; confirm all brake markers
- 10–25 min: Hot lap runs — focus on the final corner and main straight entry speed. Use iRacing’s relative timing to identify your weakest sectors
- 25–35 min: Simulate a race start: use AI opponents or find a hosted session. Practice Lap 1 hairpin approach in traffic
- 35–45 min: Race-pace laps — identical effort every lap, no heroics. Track lap-to-lap delta using the in-game overlay
- 45–55 min: Brake bias experiment — run 5 laps at 54%, then 5 laps at 55.5%, compare feel and delta
- 55–60 min: Mental review — replay your best and worst laps; identify the single corner where the most time is being lost
Resources for analysis:
- Garage 61 (garage61.net) — Free telemetry upload and comparison tool for iRacing. Compare brake traces, speed traces, and steering angle with faster drivers’ data
- iRacing ghost laps — Use the built-in ghost/time trial overlay to visually compare your line and braking points
Consistency targets: Without inventing specific lap times, community-sourced Track Titan data for this combination shows a competitive hot lap target of approximately 54.8 seconds. Beginners should target getting laps consistent within 1.5s of this, intermediates within 0.5s. app.tracktitan
Checklist Before Racing
Use this before every race session:
Preparation:
- Brake bias confirmed at starting point (~54% front for stock fixed setup) youtube
- Brake markers mentally confirmed: T1 (~100m boards) and Hairpin (~50 board on right) youtube
- T2 entry curb (right side bump) noted — plan wide entry
- Track limits reviewed: exit astroturf at T1 and hairpin exit = instant spin risk
Qualifying:
- Out-lap planned for tire warmup (minimum 1 full lap)
- Gap to cars behind/ahead: at least 3–4 seconds before flying lap
- Conservative T2 plan (no curb clipping)
- Hairpin as the lap time priority corner
Race start:
- Add 20–30m to hairpin marker on Lap 1
- Smooth clutch/throttle for launch (traction is fragile at standing start)
- First corner: brake early, give room
In-race reminders:
- One defensive move only; then hold line
- Don’t divebomb T2 in the opening lap chaos
- Late-race: protect hairpin exit — it sets up the draft pass opportunity
- Final lap: draft from P2 may be preferable to leading into the hairpin
Helpful Links and Resources
1. Erilla — Track Guide Okayama Short Ray FF1600 Fixed iRacing (YouTube)
- URL: https://www.youtube.com/watch?v=KRnKtDz7ENs youtube
- Why useful: The most directly relevant video for this exact combo — fixed setup, Okayama Short, FF1600. Covers every corner, curb usage, and T2 bump warning
- Limitation: Published May 2023; iRacing builds may have minor tire model updates since
2. iRacing Hot Lap Guide — Ray FF1600 Okayama Short 54.850 (YouTube)
- URL: https://www.youtube.com/watch?v=ulak6QszqI8 youtube
- Why useful: Recent (May 2025) hot lap guide with confirmed brake bias (54%) and visible braking markers. Excellent visual reference for line and brake markers
- Limitation: Focused on single fast lap; less racecraft advice
3. crexLive — iRacing Okayama Short Ray FF1600 Guide Lap + Hot Lap (YouTube)
- URL: https://www.youtube.com/watch?v=4mBZeLjTOjI youtube
- Why useful: Includes guide lap commentary, hot lap demonstration, and downloadable .blap ghost file for practice comparison
- Limitation: From July 2023; verify .blap file is still compatible with your iRacing build
4. Track Titan — Ray FF1600 Okayama Short Track Guide
- URL: https://app.tracktitan.io/track-guides/en/ray_formula_1600-okayama_short-iRacing-Track-Guide/5 app.tracktitan
- Why useful: Provides specific braking points, minimum speeds, and gear recommendations per segment. Shows a 54.807s reference lap time. Good for intermediate/advanced drivers
- Limitation: AI-generated guide format; use as a reference point, not gospel
5. Coach Dave Academy — The Formula Ford FF1600 iRacing Guide
- URL: https://coachdaveacademy.com/tutorials/iracing-guide-ray-ff1600/ coachdaveacademy
- Why useful: Excellent general car overview covering power delivery, tire behavior, gearbox usage, and trail braking fundamentals. Applies to all tracks
- Limitation: Not Okayama-specific; general FF1600 guidance
6. Formula Rookies — Formula Ford Race Strategy for iRacing Rookies
- URL: https://www.formularookies.com/iracing-help/formula-ford-race-strategy/ formularookies
- Why useful: Comprehensive race strategy guide including Okayama-specific section. Covers drafting, defending, tire management, and endgame strategy in detail
- Limitation: Covers both Short and Full layouts; verify which applies to your series week
7. iRacing Official — Max Esterson Insight on the Ray FF1600
- URL: https://www.iracing.com/insight-max-esterson-on-the-ray-ff1600/ iracing
- Why useful: Official iRacing car development article with driver insight; confirms open differential behavior and throttle application tips
- Limitation: Published March 2023 at car launch; most physics-level content still applies
8. iRacing Official — Okayama International Circuit
- URL: https://www.iracing.com/tracks/okayama-international-circuit/ iracing
- Why useful: Official track page with layout description, turn count, corner names, and circuit history
9. Brakinglab — Okayama Short iRacing Track Guide
- URL: https://www.brakinglab.com/en/iracing-planner/tracks/okayama-international-circuit-short brakinglab
- Why useful: Track planner with layout overview; useful for visual reference and corner mapping
- Limitation: Not FF1600-specific
10. Garage 61 — Free iRacing Telemetry
- URL: https://garage61.net
- Why useful: Upload your iRacing .ibt telemetry files and compare your brake traces, speed, throttle, and steering angle against other drivers on the same track/car. Invaluable for finding where you’re losing time
- Limitation: Requires other drivers to have also shared data for meaningful comparison
Final Advice
Top 5 Lap-Time Gains (in order of impact)
- Nail the hairpin exit. The back straight is your biggest straight. Every 1 mph of extra exit speed from the hairpin compounds over the entire straight. Accept a deeper, later apex even at the cost of entry speed youtube
- Get the final corner right. This sets your entire main straight speed. A late apex here with committed early throttle is the second-biggest single-corner time gain app.tracktitan
- Smooth your brake release. A dumped brake pedal kills front grip and causes either understeer or entry snap. Smooth it to zero over half a second as you add steering formularookies
- Avoid the T2 curb trap. A wide entry to Williams costs maybe 0.05s. A curb-induced destabilization that ruins your hairpin approach costs 0.3–0.5s (or a spin) youtube
- Use brake bias as a tool. If the car underrotates, nudge bias rearward 0.2–0.5%. If entry oversteer is a problem, move forward. This single in-car adjustment can transform your confidence mid-race formularookies
Top 5 Race Result Improvers
- Survive Lap 1 at all costs. Add 20–30m to braking markers on Lap 1. One clean lap in chaos earns more positions than three fast but risky laps
- Pass at the hairpin, not at T2. The hairpin is the only place where a clean, race-finishing pass can be reliably executed. T2 divebombs cause incidents for both drivers
- Use the draft rather than fight for it. P2 in a draft train is often faster to the finish than P1 in clean air. Time your run to the last lap
- Defend with a late apex, not a block. One move, then hold your line with a late apex that protects exit speed. This takes the position AND keeps you faster
- Keep incident count at zero. Every x4 on your license costs iRating and race positions. The driver who finishes cleanly in 5th usually gains more than the driver who qualified 2nd and took a 4x contact
The single most important practice recommendation: Watch the Erilla Okayama Short track guide video and the 54.850 hot lap video, then practice the hairpin in isolation using active reset until your exit speed is consistent. Everything else in this car at this track flows from that one corner. youtube